 Save to Pinterest
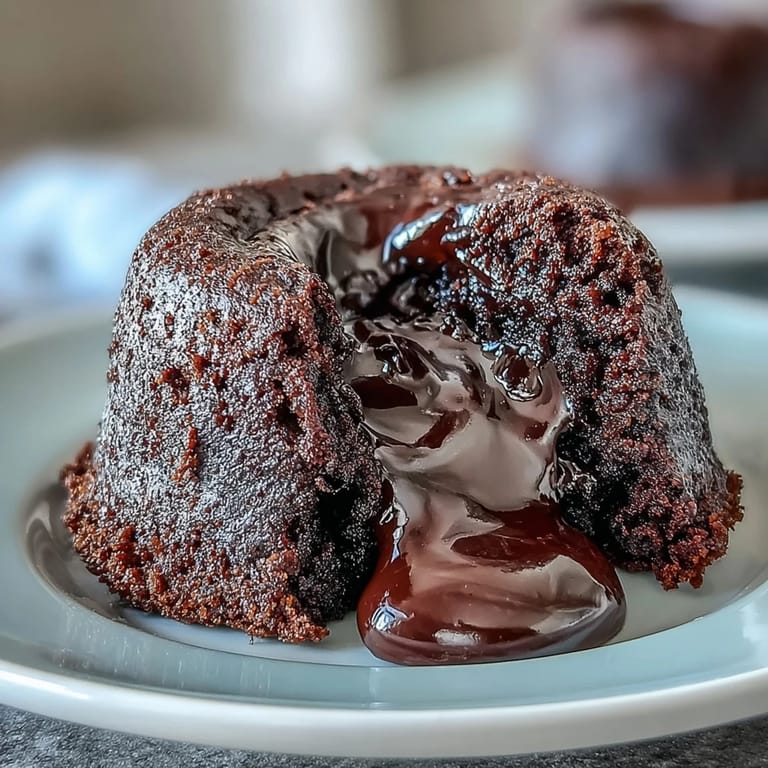
 The timer went off at exactly twelve minutes, and I held my breath watching those little ramekins come out of the oven. Their tops had just started to crack, edges firm, centers still wobbly with promise. I had burned through three attempts the week before, either baking them into solid cakes or pulling them out too soon, leaving nothing but liquid mess on the plate. This time, though, the espresso powder I stirred into the melted chocolate filled the kitchen with a smell that made everything feel right.
I made these for a dinner party where I had wildly overestimated my own confidence. Four friends sat at the table while I frantically checked the oven every thirty seconds, convinced I had ruined dessert. When I flipped the first one onto a plate and that glossy chocolate spilled out, someone actually gasped. It was the kind of moment that makes you forget how stressed you were five minutes earlier.
Ingredients
- Bittersweet or semisweet chocolate (115 g): This is the soul of the cake, so use something you would happily eat on its own; cheap chocolate tastes cheap baked.
- Unsalted butter (115 g, plus extra for greasing): Adds richness and helps create that silky molten center; salted butter throws off the balance.
- Large eggs (2) and egg yolks (2): The yolks give the batter body and that custard like texture in the middle when it is still molten.
- Granulated sugar (100 g): Just enough sweetness to let the chocolate shine without turning it into candy.
- All purpose flour (30 g): A small amount holds everything together without making it cakey; too much and you lose the lava.
- Instant espresso powder (1 tsp): This is the secret that makes people ask what you did differently; it does not taste like coffee, just makes chocolate taste more like itself.
- Pure vanilla extract (1 tsp): Smooths out any bitter edges and adds warmth.
- Pinch of salt: Brings every flavor into focus.
Tired of Takeout? 🥡
Get 10 meals you can make faster than delivery arrives. Seriously.
One email. No spam. Unsubscribe anytime.
Instructions
- Prep your ramekins:
- Preheat the oven to 220°C (425°F). Butter the insides of four ramekins generously, then dust them with cocoa powder, tapping out the excess so you have a thin, even coat that will help the cakes release cleanly.
- Melt the chocolate and butter:
- Set a heatproof bowl over a pan of simmering water, making sure the bottom does not touch the water. Add the chopped chocolate and butter, stirring slowly until everything melts into a smooth, glossy pool, then remove from heat and let it cool for a few minutes.
- Whisk the eggs and sugar:
- In a separate bowl, whisk the eggs, egg yolks, and sugar together for about two to three minutes until the mixture turns pale and thickens slightly. It should leave a ribbon when you lift the whisk.
- Add espresso and vanilla:
- Stir the espresso powder and vanilla extract into the cooled chocolate mixture until fully dissolved and fragrant.
- Combine chocolate and eggs:
- Gently fold the chocolate mixture into the egg mixture using a spatula, working slowly so you do not deflate all the air you just whisked in.
- Fold in flour and salt:
- Sift the flour and salt over the batter, then fold it in gently until just combined; stop as soon as you do not see any streaks of flour.
- Fill the ramekins:
- Divide the batter evenly among the prepared ramekins, filling each about three quarters full.
- Bake:
- Place the ramekins on a baking sheet and bake for eleven to thirteen minutes, until the edges look set and firm but the centers still jiggle slightly when you gently shake the pan.
- Invert and serve:
- Let the cakes rest for one minute, then run a thin knife around the edges to loosen them. Invert each ramekin onto a dessert plate, lift it off gently, and serve immediately while the center is still molten.
 Save to Pinterest
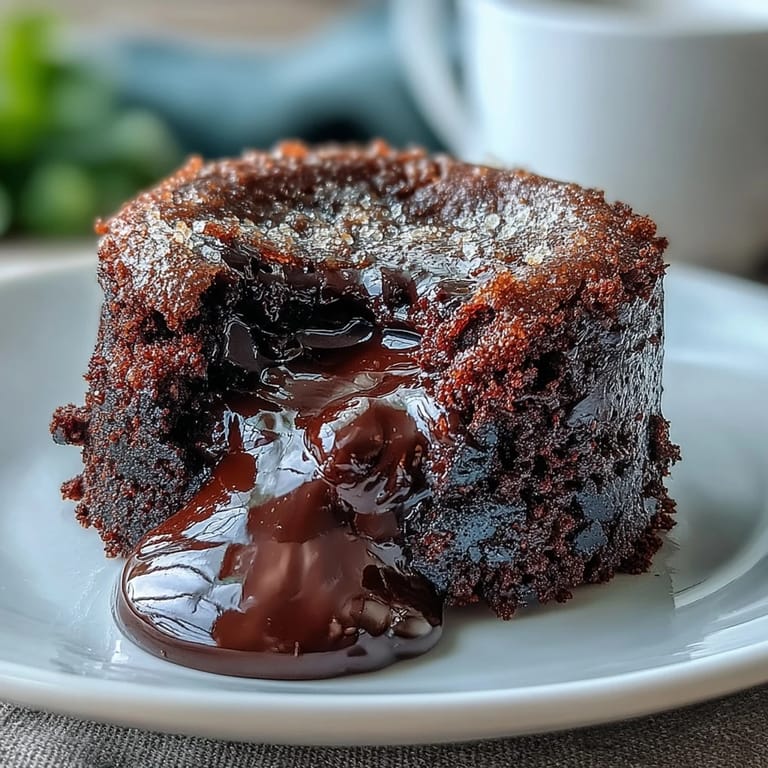
 There was a night when I served these with nothing but a dusting of powdered sugar, and my brother in law, who rarely compliments anything, looked up mid bite and said it tasted like the best part of a brownie. That is exactly what it is, the gooey center you fight over, but in its own perfect little cake.
Timing and Texture
The difference between molten and fully baked comes down to about sixty seconds, which sounds terrifying but becomes intuitive after the first try. The edges should look matte and firm, while the center stays shiny and soft. If you gently shake the pan and the middle jiggles like set custard, not like liquid, you are right where you need to be. I keep a small flashlight near the oven because my oven light is useless, and checking through the glass saves me from opening the door and losing heat.
Serving Suggestions
Vanilla ice cream is the classic pairing, and for good reason; the cold cream melting into the warm chocolate is perfect contrast. Whipped cream works beautifully too, especially if you sweeten it just a little and add a splash of vanilla. I have also served these with fresh raspberries on the side, and the tartness cuts through the richness in a way that feels almost necessary after the second bite. Once, I drizzled a tiny bit of salted caramel over the top, and it was almost too much, but in the best possible way.
Make Ahead and Storage
You can make the batter a few hours ahead and keep it in the fridge, which is a lifesaver when you are hosting. Just bring the ramekins to room temperature for about fifteen minutes before baking, or add an extra minute or two to the bake time. These do not keep well once baked; the magic is in serving them immediately, straight from the oven to the plate. Leftovers can be reheated in the microwave for about twenty seconds, but they lose that perfect molten center and turn into something closer to a dense brownie.
- If you want a stronger coffee flavor, bump the espresso powder up to one and a half teaspoons.
- Dust the ramekins with cocoa powder instead of flour for a cleaner chocolate flavor and no white streaks.
- These bake faster in metal ramekins than ceramic, so keep an eye on them if you switch.
 Save to Pinterest
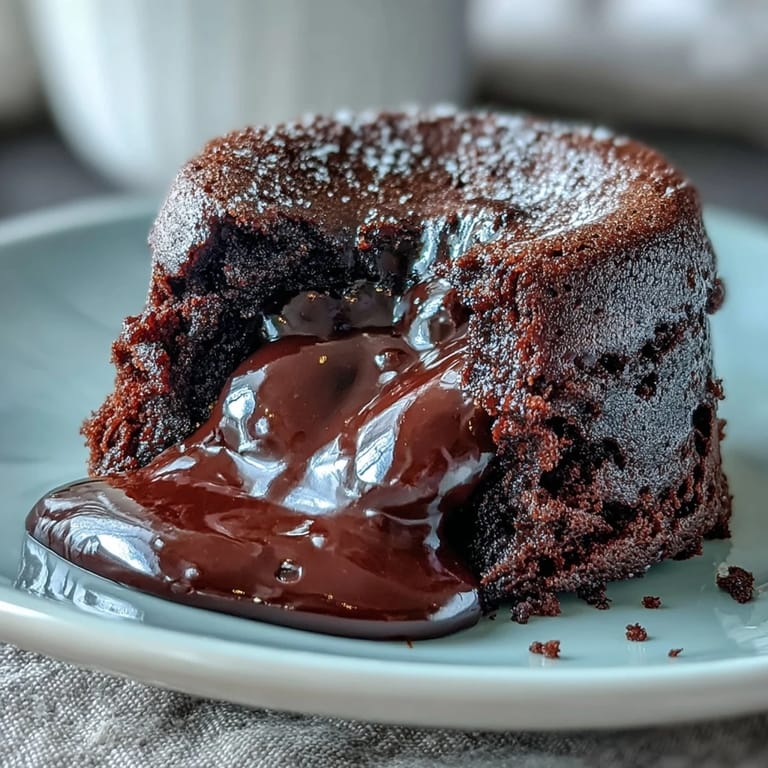
 There is something about cracking into a dessert that feels like a secret, especially when it is something you made with your own hands. These little cakes never stop feeling special, no matter how many times you make them.
Recipe FAQs
- → How do I know when the lava cakes are done?
The edges should be firm and set, pulling away slightly from the ramekin sides, while the centers remain soft and jiggly. Baking for 11-13 minutes at 220°C (425°F) typically achieves this perfect balance.
- → Can I make the batter ahead of time?
Yes, you can prepare the batter several hours in advance and refrigerate it in the ramekins. Bring them to room temperature for about 20-30 minutes before baking for best results.
- → What type of chocolate works best?
Bittersweet or semisweet chocolate with 60-70% cacao content provides the ideal balance of richness and sweetness. High-quality chocolate ensures a smooth, luxurious molten center.
- → Why add espresso powder to chocolate desserts?
Espresso powder enhances and deepens the chocolate flavor without making the cakes taste like coffee. It adds complexity and richness that makes the chocolate taste more intense.
- → Can I use different sized ramekins?
While 170 ml (6 oz) ramekins are ideal, you can use slightly different sizes by adjusting baking time. Smaller ramekins need less time, while larger ones require a minute or two more.
- → How do I prevent the cakes from sticking?
Thoroughly butter the ramekins and dust with cocoa powder, tapping out excess. Running a thin knife around the edges before inverting also helps release the cakes cleanly onto plates.